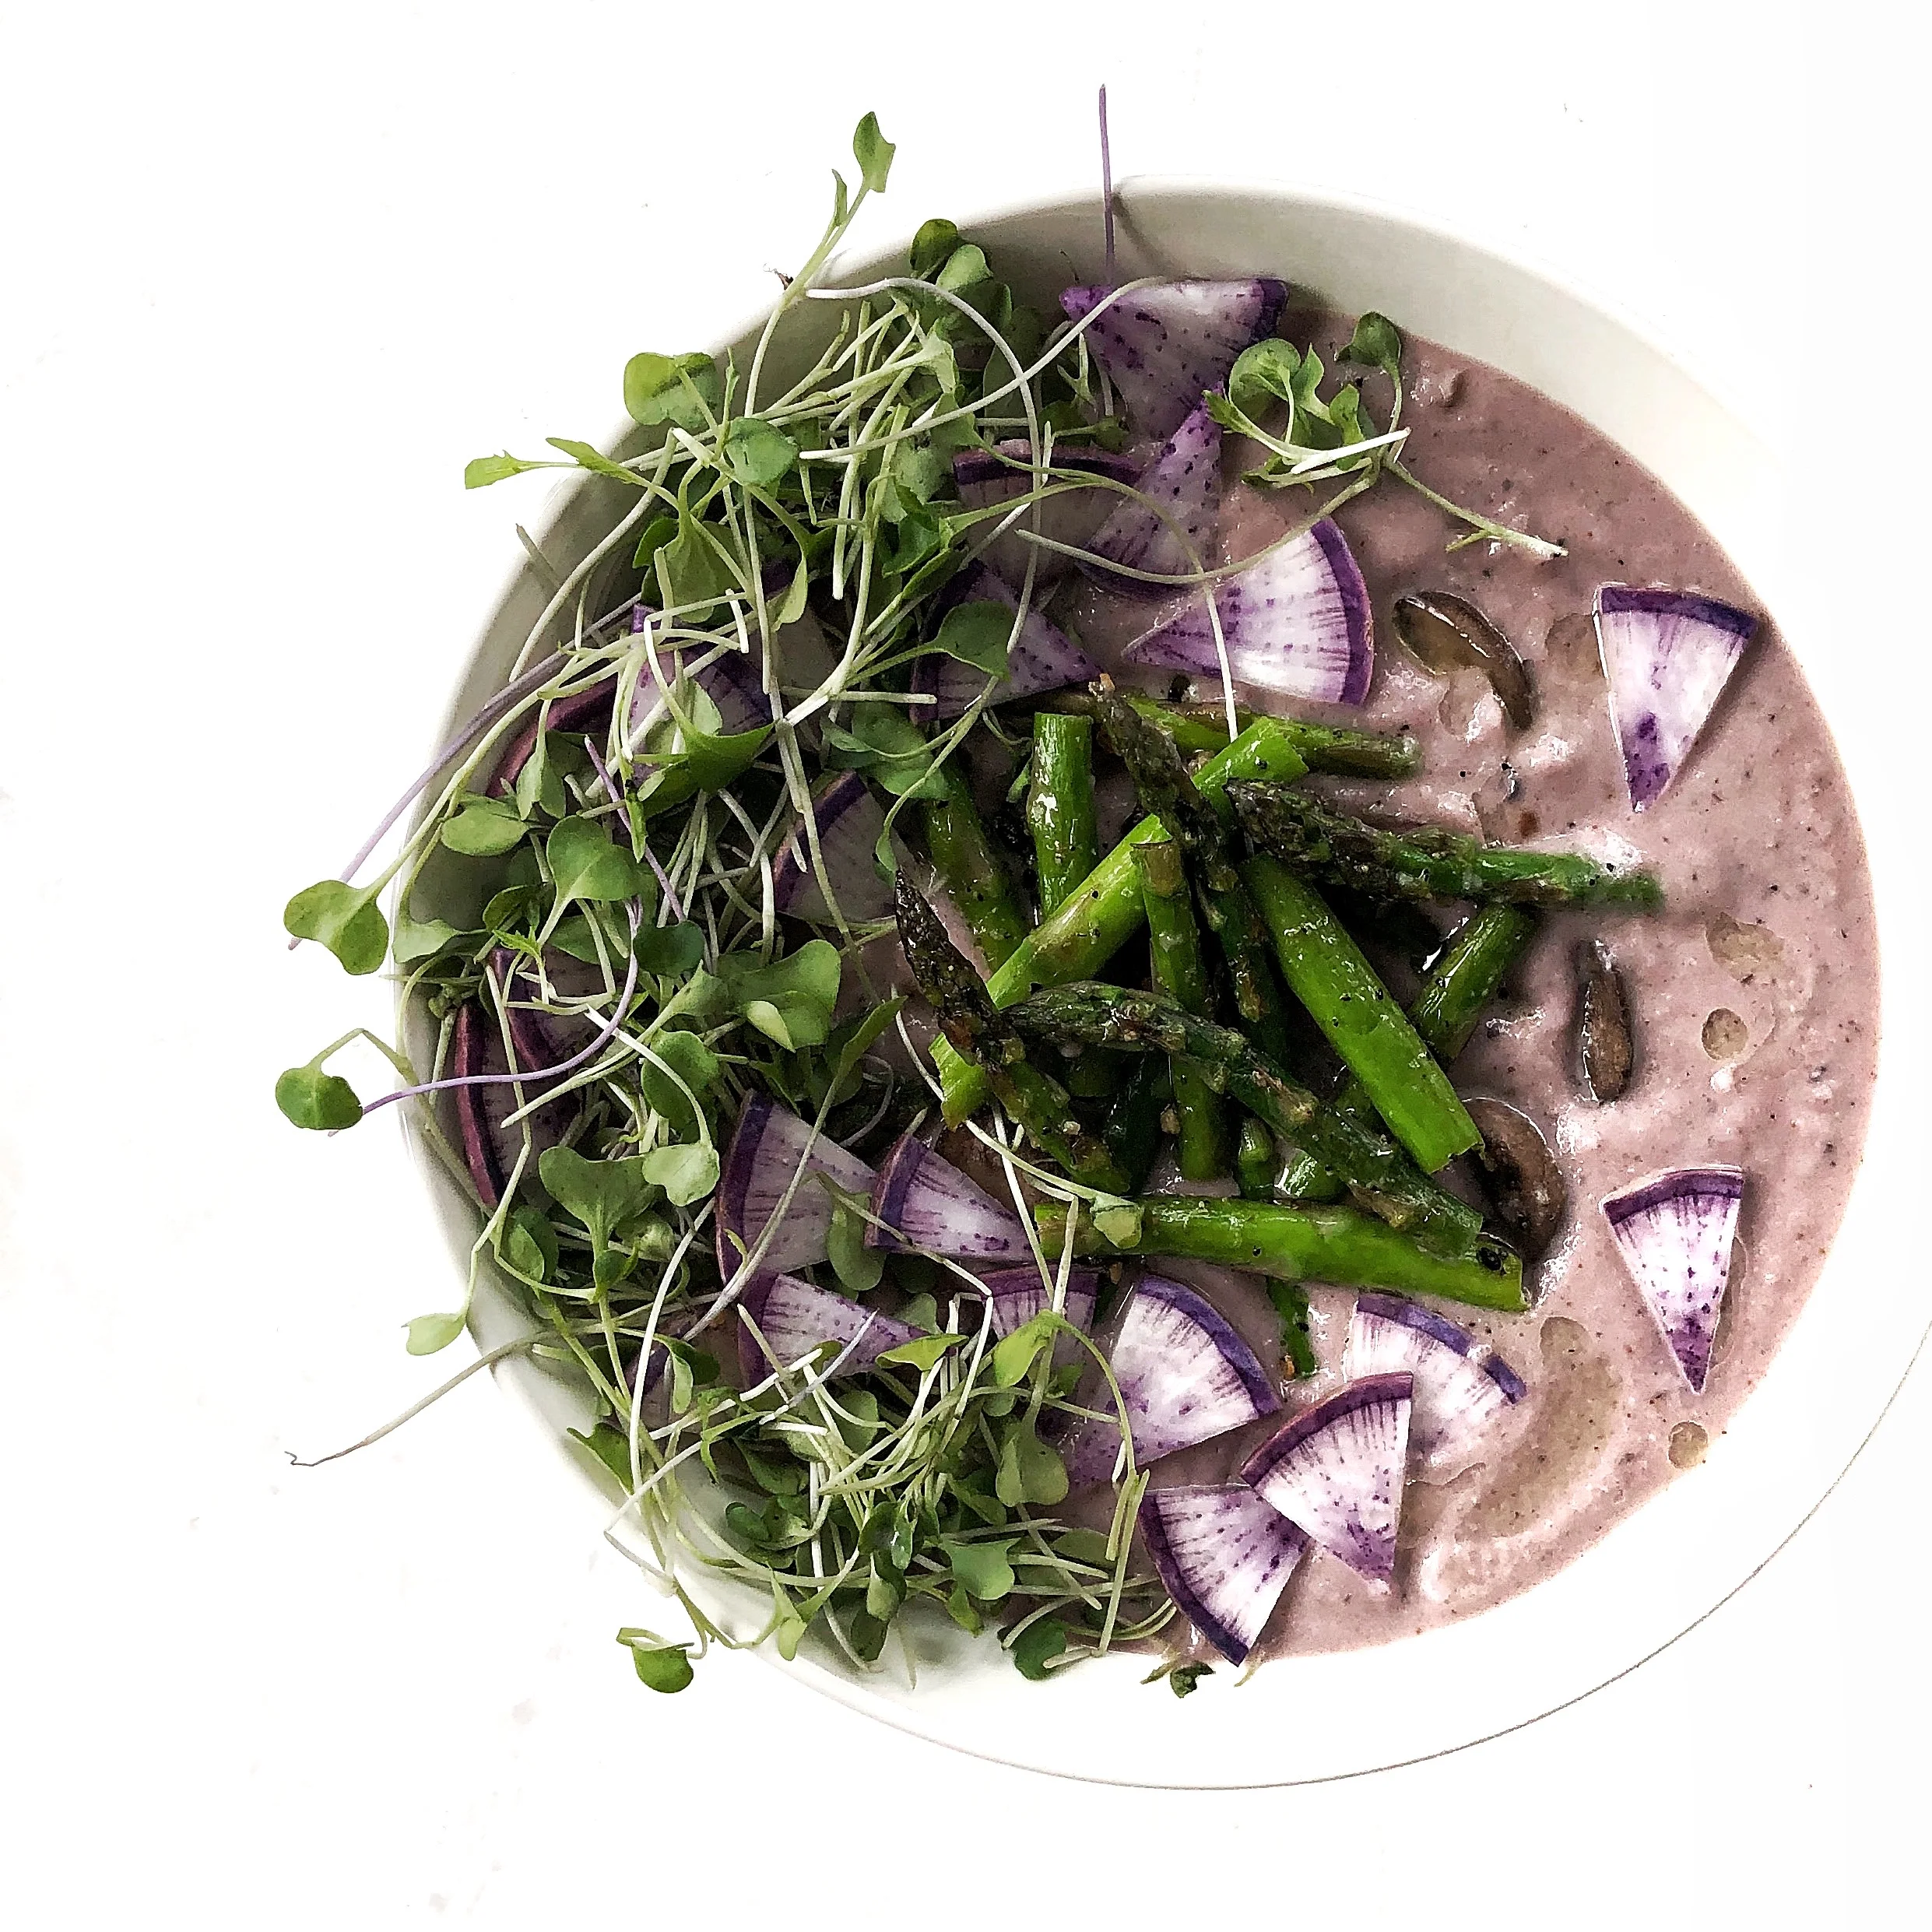
Pasta and Mushrooms W/ Alfredo Sauce (dairy-free and gluten-free)

I think pasta with alfredo sauce is one of the ultimate comfort foods. But the regular version full of dairy and gluten would put me in a food coma right after eating it. I absolutely love making a not-so-healthy recipe into a healthy one that is full of flavor. That’s the key with eating healthy; the food MUST taste good and be full of flavor. This pasta dish with mushrooms and alfredo sauce definitely does not disappoint.

alfredo pasta with mushrooms.jpeg

Ingredients:

1.5 tbsp nutritional yeast

2 tbsp olive oil

1 cup water

1/2 cup cashews

1 tsp red pepper flakes

1 tsp sea salt

1 tsp black pepper

5 garlic cloves, minced

1 shallot, minced

3 tbsp grass fed butter, divided

10 oz shiitake mushrooms, sliced

10 oz gluten-free spaghetti or fettuccine noodles

Directions:

1. Sauté the shallot, garlic, and 2 tbsp butter for 5-7 minutes on medium-low, until golden brown and set aside.

2. Bring a pot of water to a boil for the noodles. Cook the pasta according to the box and rinse the noodles once they’re cooked and set aside.

2. Blend the nutritional yeast, olive oil, water, cashews, red pepper flakes, sea salt, and black pepper until thoroughly combined and smooth.

3. In the same pan you used for the shallot mixture, add 1 tbsp butter and the shiitake mushrooms. Sauté the mushrooms, on medium-low heat, until tender and cooked through. Once cooked, add the alfredo sauce mixture and fold in the pasta. Keep stirring until thoroughly combined and heated through.

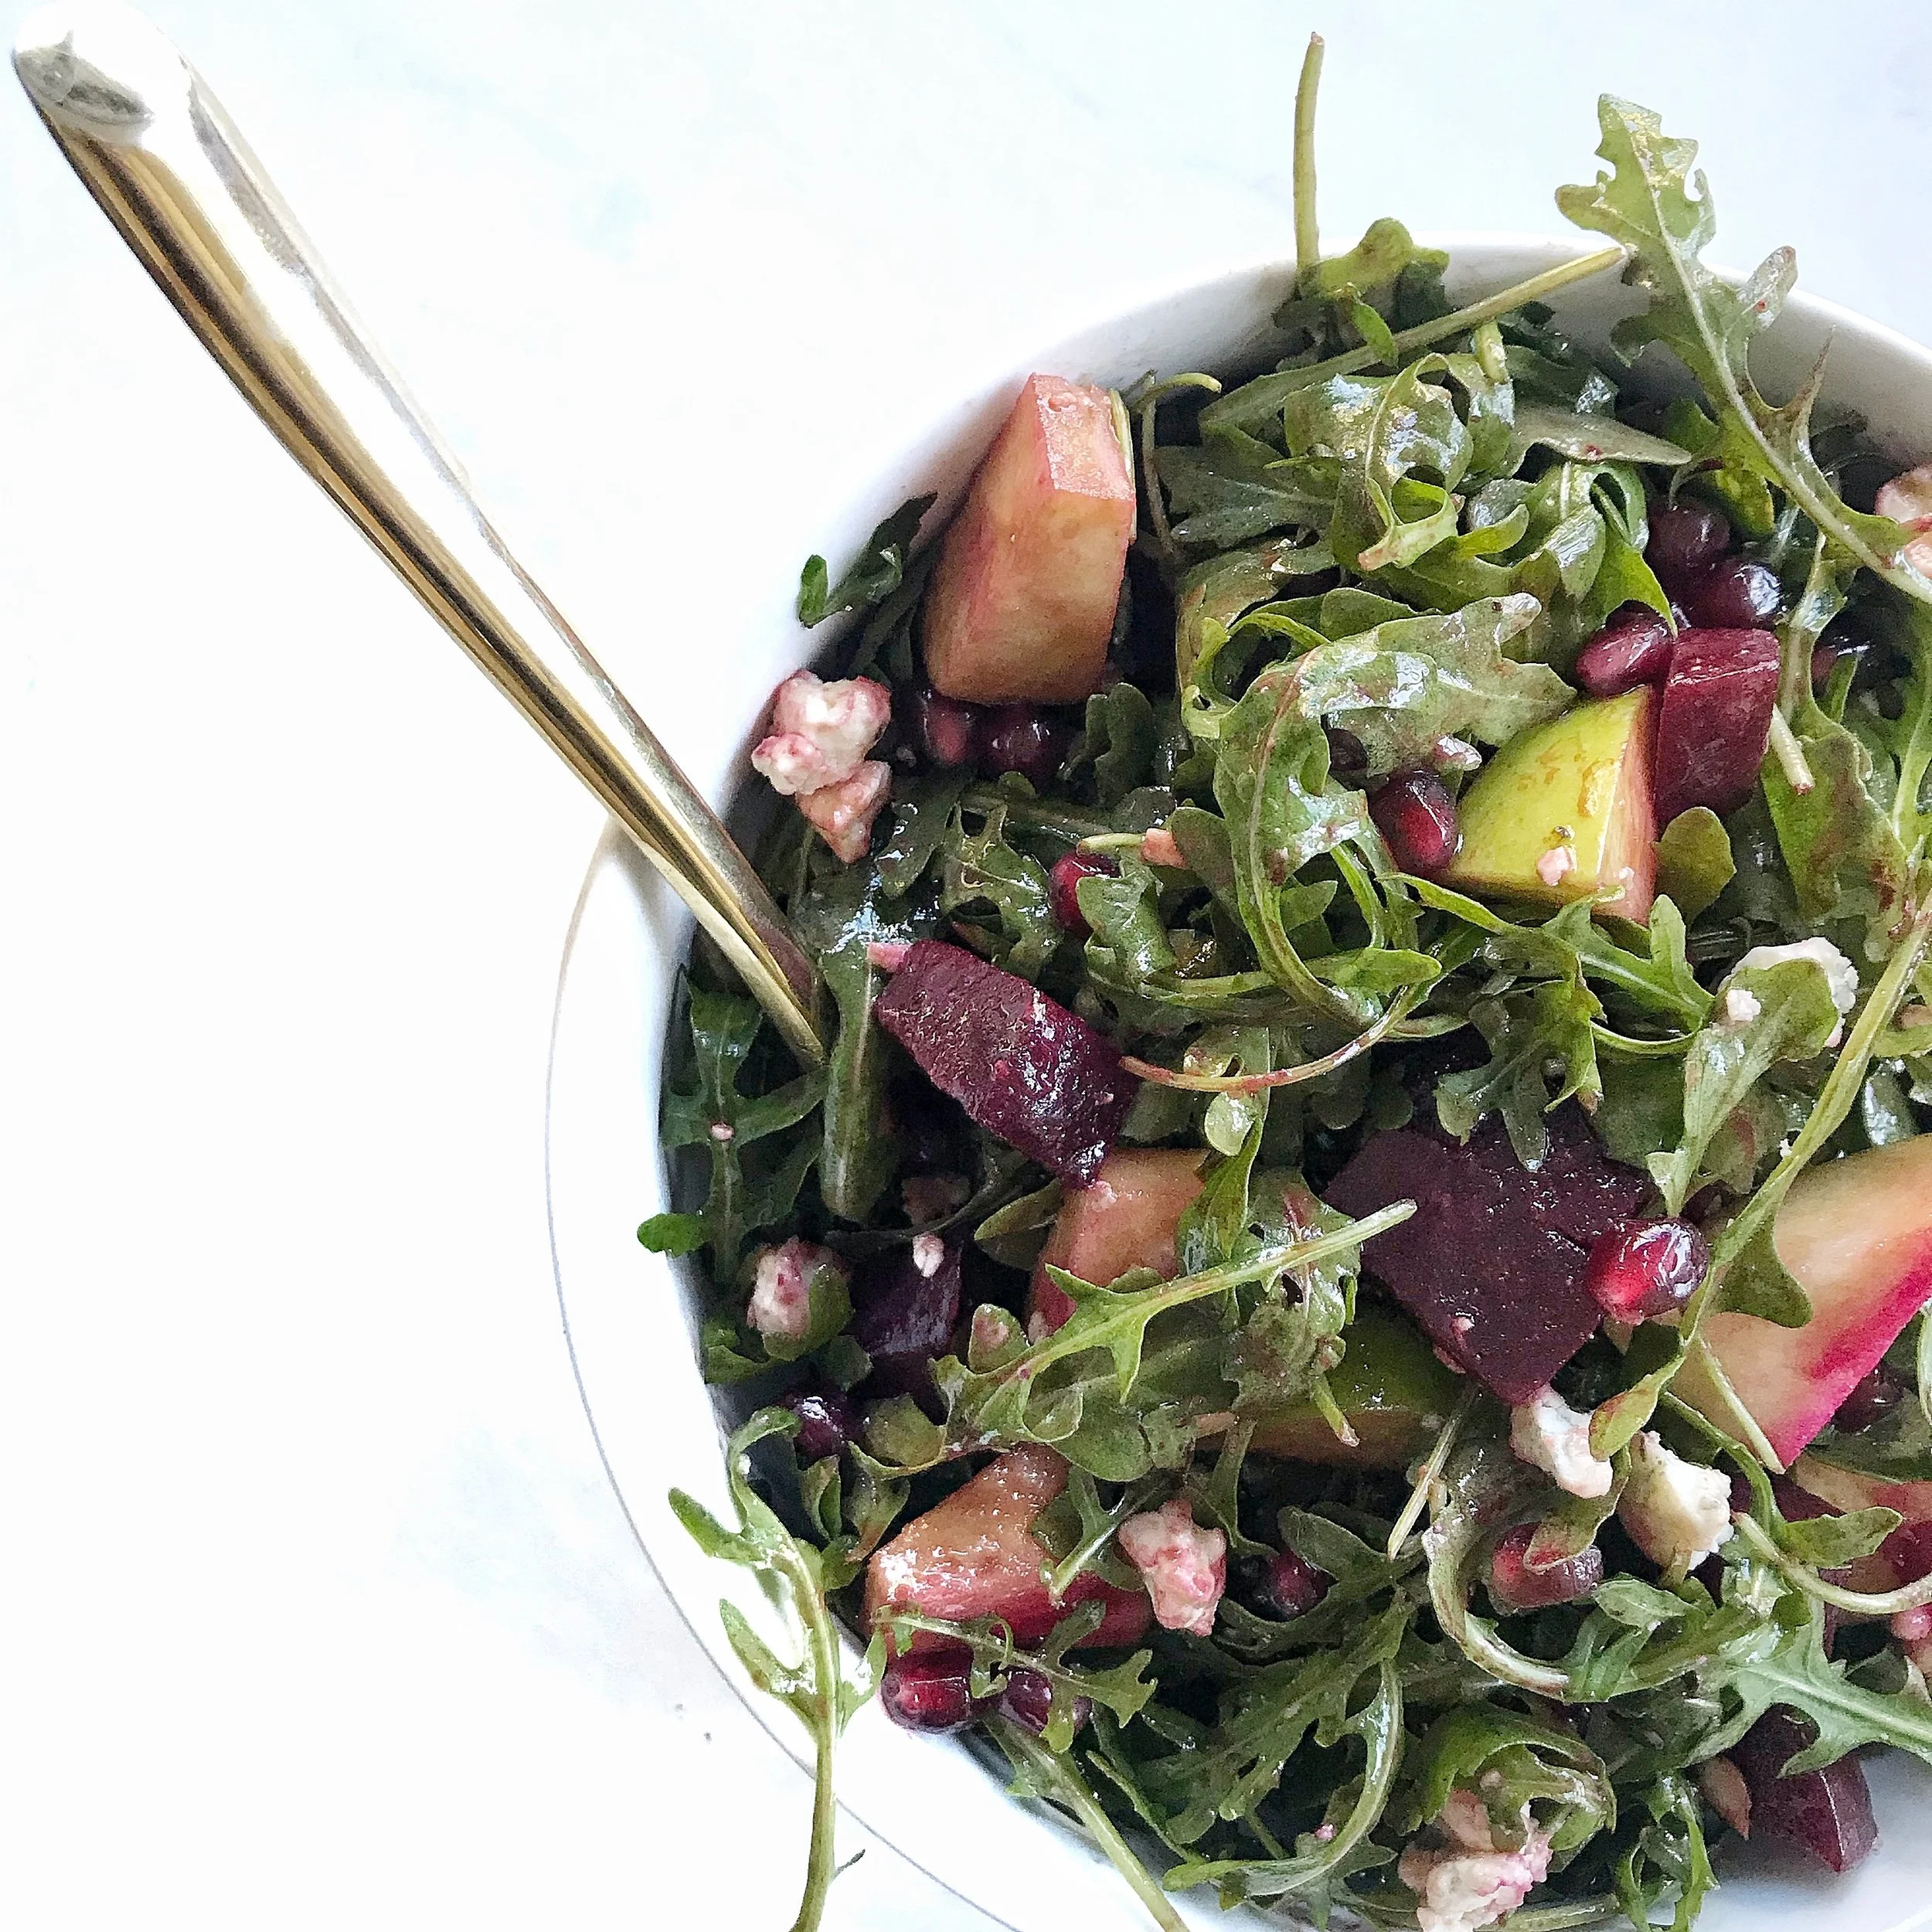
I hope you enjoy this recipe as much as I do! Perfect with a salad on the side. Xo

With love,

Ashley

Comment

Greek Quinoa Salad

This is one of my favorite salads to make as a side dish or even a main meal. Its filling because of the quinoa and you also get a rainbow of different vegetables. It’s one of the simplest salads that I love to eat all year round, but it definitely makes me feel all summery. This is also a great salad that you can make ahead or make a big batch of and have it for a few days.

greek quinoa salad.jpeg

Ingredients:

1 cup dry quinoa, cooked (ends up roughly 3 cups cooked)

1 yellow bell pepper, diced

1 cucumber, diced

1 cup cherry tomatoes, cut into half

1/2 red onion, diced

1/2 cup kalamata olives, cut into half

cilantro for garnish

1/2 lemon, juiced

1 tbsp apple cider vinegar

4 tbsp extra virgin olive oil

4 large garlic cloves, minced

1/2 tsp red chili flakes

1/2 tsp sea salt

1/2 black pepper

optional: feta cheese for topping

Directions:

Mix the lemon, apple cider vinegar, olive oil, garic, red chili flakes, sea salt, and black pepper together until thoroughly combined. Combine the quinoa with all of the chopped vegetables. Drizzle the dressing mixture over the top of the quinoa and vegetables and stir until thoroughly combined and coated. Garnish with cilantro and feta cheese if you choose. Enjoy xo

With love,

Ashley

Comment

Gluten-Free Pasta Salad w/ Fresh Vegetables

Ever since I can remember I’ve been a pasta feen. My favorite food growing up was spaghetti. I always wanted it for dinner, my brothers did not. I’m convinced I could eat pasta of some sort every single day for life. Since I eat a mainly gluten-free diet (except for somer rare occasions/exceptions), I’ve had to find other ways to get my pasta fix. I have tried MANY gluten free pastas, some of which I’ve had luck and some of which I have not. I finally came across Jovial gluten-free pasta and absolutely love them. The taste and texture is almost the same as regular pasta and it doesn’t fall apart like some other brands do. Plus, they are super clean and only use two ingredients; organic brown rice flour and water. Thats a win win in my book. This is my favorite Jovial pasta to use.

pasta and veggie salad.jpeg

I love making this pasta salad. It’s filling, fresh, and has lots of flavor. It’s perfect for anytime of year, but I particularly love it around spring and summer. You can choose whatever vegetables you want and play around with it a bit. I love using a variety of colored vegetables. It makes me feel like I’m getting my pasta and eating well for my body at the same time. I hope you enjoy!

Ingredients:

1/2 red onion, thinly sliced and slices cut into 1/4’s

1 large carrot, chopped into rounds

1 watermelon radish, thinly sliced and slices cut into 1/4’s

1 cup cilantro leaves

1/2 yellow bell pepper, thinly sliced and slices cut in 1/2

1 jalapeño, thinly sliced

6 oz gluten free pasta, cooked

Dressing:

1/2 lemon, juiced

2 tsp apple cider vinegar

1/2 tsp red chili flakes

1/2 tsp sea salt

1/2 tsp black pepper

3 large garlic cloves, minced

3 tbsp extra virgin olive oil

Directions:

1. Mix all veggies together. You can always substitute any vegetables you enjoy- just make sure you have roughly 3 1/2 to 4 cups of vegetables altogether.

2. Add the cooked pasted to vegetable mixture.

3. Mix all of the dressing ingredients together until well combined. You can always add a little more

lemon if you want a stronger citrusy flavor or more garlic if you like.

4. Pour the dressing over the top of the mixed vegetables and pasta and stir until thoroughly combined.

I hope this recipe gives you that pasta fix like it does for me! Xo

With love,

Ashley

Comment

Chocolatey Peanut Butter Bars

IMG_9793.jpg

Oh my YUM. These are so good and incredibly easy! Plus, there is no baking necessary. So, if you swear by the fact that you are not a baker, then no worries, I got you. You just pop these in the freezer, let them harden and enjoy! They’re free of refined sugar and include one of the best combos ever; peanut butter + chocolate. I’m obsessed with these and I hope you love them too!

Ingredients:

1 cup almond flour or almond meal

7 medjool dates, pitted

1/2 cup peanut butter

1/2 cup and 2 tbsp maple syrup

2 tbsp coconut oil

113g 80-85% dark chocolate bar (for baking)

Directions:

1. Combine the almond flour and dates in a food processor or blender until smooth. Press firmly into a small form or baking dish.

2. Combine the peanut butter and 1/2 cup of maple syrup into high speed blender or food processor for just a few seconds, until mixed together. Pour over the top of the date and almond flour layer. Pop into the freezer.

3. In a small sauce pan, melt the chocolate on low and add in coconut oil and maple syrup. Stir until completely melted and combined. Pour over the peanut butter layer and let set in the freezer for 20-30 minutes or until the chocolate is hardened.

You can store these in the fridge or freezer. If you store in the fridge, they last about a week. The freezer keeps them for a bit longer, I would say at least 3 weeks, but I always eat them before then so it’s hard to say! I hope you enjoy. xo

With love,

Ashley

Comment

The Glowiest Green Juice Recipe

IMG_8962.jpg

I love green juice. So much. I’m personally not a fan of juice cleanses because I don’t think they’re right for my body; I get shaky, light headed, very spacey, anxious, and really tired. Some would say those can be attributed to detox symptoms, but I think it’s my body’s way of telling me that it needs substance. I know some people who feel A M A Z I N G on juice cleanses, and to that I say, you go girl (or boy). They’re just not for me and that is totally okay. It’s all about listening to our own bodies, after all. With that being said, I think green juice is an amazing addition into ones diet. It’s full of so many beneficial nutrients like antioxidants, vitamins, minerals, and enzymes and is very hydrating and energizing. It’s also absorbed into your bloodstream within minutes due to the fact that your body doesn’t have to break anything down like fiber, fats, protein, or carbohydrates. Since it is absorbed into your bloodstream so quickly, it’s very important to make sure all the produce being juiced is organic otherwise you will get a hit of pesticides, herbicides, and other chemicals straight to your bloodstream.

I like to juice a combination of green vegetables and some fruit that is lower in sugar such as green apples, lemons, and limes. This ensures that my juice still tastes good, but doesn’t have a crazy amount of sugar in it. Once again, since the juice is being absorbed into your bloodstream so quickly, if there is a lot of sugar in your juice, this will spike your blood sugar. Below is one of my favorite green juice recipes that tastes amazing, is a nutrient powerhouse, and is super hydrating which will give you that glowy skin and lots of energy. And because it is one of the most asked questions I receive, here is the juicer that I use and love (p.s. it’s super easy to clean which is a major plus!).

The Glowiest Green Juice

Ingredients:

6 large dino kale leaves

1 cucumber

2 cups broccoli

1 lemon, peeled

1 lime, peeled

1 green apple

1/2 pear

2 inch knob of ginger

Directions:

Chop ingredients into small pieces and feed them through the juicer, one at a time. This recipe makes about 16 ounces depending on how large your produce is. Happy juicing!

With love,

Ashley

Comment

Strawberries and Cream Smoothie

So, this was different for me. I ALWAYS add greens in some form to my smoothies. Whether it’s spinach, spirulina, kale, or some kind of greens powder, but this time I left them out. I wanted to make more of a “dessert” smoothie this time and it was SO good. This won’t be a part of my regular routine because I crave my greens, but it’s such a good option when I’m wanting something sweet but still healthy.

Strawberry smoothie.jpeg

Ingredients:

1 cup almond or coconut milk

1 1/2 cup frozen strawberries

1/2 fresh or frozen banana (frozen will make your smoothie thicker)

1 scoop of vanilla protein (I used this one)

2 tbsp goji berries (this is the brand I use)

1 tbsp hemp seeds

1 tbsp chia seeds

2 medjool dates, pitted

1 tsp cinnamon

Directions:

Blend all the ingredients until smooth. Enjoy loves xo

With love,

Ashley

Comment

Gluten-free + Dairy-free Mac and Cheese

Mac and Cheese has always been one of my favorites. It’s one of the ultimate comfort foods and probably something I could eat every single day. I don’t tolerate gluten or dairy very well, so I wanted to make my own version with some added health benefits. I played with the recipe a bit before I finally felt like I got the flavor right. Thats the thing about recipe testing and trying to make less healthy recipes a bit more healthy; it’s a lot of trial and error. I absolutely love playing in the kitchen though. It’s such a stress reliever for me, puts me in my happy place, and lets me be creative all while making nourishing recipes. I hope you enjoy this recipe as much as I do.

macandcheese.jpeg

Ingredients:

4 cups uncooked gluten free pasta (I like using shells or bowties)

6 tbsp nutritional yeast

3 tbsp avocado oil

4 garlic cloves

1 cup unsweetened almond milk

2 large carrots, boiled until soft

1/4 cup cashews

1 tbsp hemp seeds

1 1/2 tbsp lemon juice

1 tsp sea salt

1/2 tsp black pepper

1/4 tsp turmeric powder

1/2 garlic powder (you can add an extra clove of garlic instead of the powder, but I like to do cloves and powder for this recipe)

Directions:

1. Cook pasta and set aside.

2. Boil water for carrots, cut both carrots in half, turn down water to a slow boil and toss carrots in. Let them cook until the carrots are soft and easy to cut through.

3. While the carrots are cooking, throw all the other ingredients (besides the pasta and carrots) in a blender and blend until smooth and thoroughly combined. Once the carrots are finished boiling, add them to the blender with the rest of the ingredients and blend until smooth.

4. Add the pasta and sauce back in the pot and heat until warmed through.

Makes between 3-4 servings. Enjoy! xo

With love,

Ashley

Comment

Chia Seed Pudding with Raspberry Jam

If you didn’t already know, I love chia seed pudding. I have a few different versions that I love to make and this is definitely one of them. I love it because its a filling breakfast and the perfect amount of sweet. It contains fiber, healthy fats, protein, and antioxidants and it keeps me full for a few hours, which is a miracle because I get hungry often. This version has a homemade “raspberry jam” which is the simplest recipe I’ve ever made and only 3 ingredients. It’s not a typical jam, but for lack of a better word, I just call it that.

chia seed pudding .jpeg

Ingredients:

5 tbsp chia seeds, divided

1 cup coconut or almond milk

2 tbsp monkfruit, divided

1 tsp maple syrup

6oz organic raspberries

optional fruit like bananas, blueberries, raspberries, or blackberries for toppings

Directions:

1. Mix 4 tbsp chia seeds, 1 cup of coconut milk, 1 tbsp monkfruit sweetener, and 1 tsp of maple syrup together and set aside.

2. Mix the raspberries, 1 tbsp of chia seeds, and 1 tbsp of monkfruit sweetener together. Mash the raspberries and thoroughly stir in the chia seeds and monkfruit. Let set for a few minutes while the chia seeds soak up the raspberries.

3. Once the chia seed and coconut mixture has been sitting for about 10-15 minutes and has thickened, you can top with raspberry jam and desired fruit toppings. The chia seed and coconut mixture is best when kept in fridge overnight to fully combine and soak, but it can be eaten right away too.

Enjoy xo

With love,

Ashley

Comment

Aloe Vera + Honey Lemonade

Aloe vera is so healing for your digestive tract. I add it to my smoothies (when I can remember to) but other than that, I don’t squeeze it into my diet in other ways. I wanted to think of a creative way to incorporate aloe vera, while masking it’s taste, and came up with this aloe vera and honey lemonade. It’s so simple, so easy, and so fresh. It’s still winter, but this drink is already making me look forward to summer.

lemonade.jpeg

Aloe Vera + Honey Lemonade

Ingredients:

3.5-4 lemons, juiced

3 cups filtered water

3 tsp manuka honey or other good quality honey (I love beekeepers naturals)

2 tbsp lakanto monkfruit sweetener

1/2 cup aloe vera gel, scooped out from the peel

optional: 2-3 drops ginger essential oil

Directions:

Blend all ingredients in a high speed blender until thoroughly combined. Top with rose petals if you want to be super fancy :) Enjoy! xo

Comment

Cauliflower and Mushroom Soup

I love this soup. It’s so, so filling and is so good for you. I originally made it with your typical white cauliflower, but when I went to get cauliflower to make it, all I could find was purple and yellow. In hindsight, I wish I would have chosen the yellow one, but I thought purple would be something fun and different. The taste didn’t vary using purple cauliflower over white, so you choose which kind you want to use!

Ingredients:

cauliflower mushroom soup.jpeg

1 cauliflower head, cut into bite sized florets

6 cups shitake or oyster mushrooms

1 14 oz can full fat coconut milk

16 oz chicken or beef bone broth

1 yellow onion, chopped

4 garlic cloves, minced

2 tbsp. grass-fed butter

2 tbsp. apple cider vinegar

1 tsp. oregano flakes

2 tsp. garlic powder

1/2 tsp. cayenne pepper

2 tsp. crushed red pepper flakes

Sea salt + Black pepper to taste

Directions

1. Heat 1 tbsp. ghee in a pan over medium heat and cook mushrooms until tender and golden. Take the mushrooms off the heat and set them aside.

2. Heat 1 tbsp. butter over medium heat and add onion, garlic, and salt and pepper to taste. Sauté until tender.

3. Add the cauliflower florets to the onion and garlic mixture remaining in the pan and sauté for 3-4 minutes. Add the broth to the mixture, cover, and simmer for 10 minutes.

4. Add coconut milk to the mixture in the pan and simmer, uncovered for another 10 minutes.

5. Turn off heat , remove soup and add i t to a high speed blender or use an immersion blender and blend until creamy and smooth.

6. Turn the stove onto medium- low heat and pour mixture back into a deep pan or pot, add the mushrooms back in.

7. Stir in the apple cider vinegar, oregano flakes, garlic powder, cayenne pepper, and crushed red pepper. Let simmer for a few minutes. Enjoy!

With love,

Ashley

Comment

Roasted Beet, Arugula and Pomegranate Salad

Okay, so if you’re not a beet fan, then I urge you to try this salad. The flavors mix so well together and balance each other out. I know beets tend to have that “earthy” taste to them, but I find that when you boil them and mix them with salty and sweet flavors, they don’t have such an over powering “dirt” taste. Plus beets are so, so good for detoxing your liver and providing your body with vitamins such as C and Folate as well as nutrients like magnesium and inorganic nitrates. Beets are also said to improve athletic performance because of their ability to improve the efficiency of mitochondria, which is responsible for producing energy in your cells. If you want to test the effectiveness of using beets to improve your athletic performance, I recommend consuming them 2-3 hours before training because that is when blood nitrate levels peak.

Anyways, lets get to the fun part, the recipe! It’s so easy, so good, and so good for you too.

beet salad.jpeg

Roasted Beet, Arugula and Pomegranate Salad

Ingredients:

5 cups of arugula

1 cup of green apple, cut into small chunks

2 medium beets, boiled and cut into 1/2 inch cubes

1/2 cup pomegranate seeds

1/4 cup of blue cheese, crumbled into small pieces (you can omit or sub for feta or a dairy free version of cheese that crumbles)

6 tbsp cold pressed olive oil

3 tbsp balsamic vinegar

2 tsp dijon mustard

salt and pepper and garlic powder

Directions

Bring a small pot of water to a boil and place your beets in the boiling water. Turn the water to medium-low and let cook for 30-40 minutes.

While your beets are cooking, crumble your blue cheese into little pieces if it isn’t already and chop your green apple into small, bite-sized chunks.

For the dressing, mix the olive oil, balsamic vinegar, dijon mustard, pinch of salt, pepper, and garlic powder all together into a small jar. Shake vigorously until completely combined.

Once your beets are done cooking, rinse them under cold water and peel the skin off. The skin should come off very easily with your hands, or you can use a paper towel to help peel it off if its not coming off easily with your hands. Once the thin peel layer is off, chop the beets up into 1/2 inch cubes.

Combine the arugula, apple chunks, pomegranate, blue cheese, beets. Pour dressing over the salad and stir to evenly coat.

Serve and enjoy!!

**Serves 3 comfortably.

With love,

Ashley

Comment

Mint Chocolate Chip Smoothie Recipe

iMAGE FROM PINTEREST

iMAGE FROM PINTEREST

I have ALWAYS loved mint chocolate chip ice cream. I created this super quick and easy recipe as a healthy alternative to one of my favorite foods. I make this for breakfast, after a work out, or when I’m craving something sweet. It’s packed with greens, protein, and magnesium.

MINT CHOCOLATE CHIP SMOOTHIE:

1 cup of almond, coconut, or cashew mylk

2 cups of spinach

1 frozen banana

1 scoop of chocolate protein (I use chocolate collagen protein from Ancient Nutrition)

1 drop of dōTERRA peppermint essential oil (you can use other reputable brands, but be careful with cheaper brands from drug stores, etc because you don’t want to be ingesting something that isn’t quality. Personally I only trust dōTERRA because of the companies commitment to quality and third party testing.)

2 tbsp cacao nibs

2 dates

optional add ins:

hemp seeds, reishi or chaga powder, spirulina, dulse, maca powder, ashwagandha, bee pollen

DIRECTIONS:

Blend everything in a high speed blender, except the cacao nibs, until thoroughly combined. Add in the cacao nibs and blend until they are broken down. If you want more of a “crunch” from the cacao nibs, just don’t blend quite as long after you add them in.

I always top mine with bee pollen for extra b vitamins. I hope you enjoy this smoothie as much as I do!

With love,

Ashley

Comment

Cashew Mylk

image from pinterest

image from pinterest

My absolute favorite “milk” to make. Cashew mylk is so dreamy (and creamy, but I really dislike that word). It’s better than Almond Mylk, in my opinion, and is a nice little switch up too. I use almond flour and almond butter on a frequent basis, so I like to make cashew mylk in order to do something different and give my body different nutrients. What makes this “milk” even better is you don’t even have to strain it! Just blend all the ingredients in a high speed blended and you are good to go! The best. Here are all the ingredients and the easiest process ever:

Ingredients:

1 cup of soaked cashews (soak for at least 2 hours, preferably around 4, in order to make the nuts easier to digest)

3.5-4 cups filtered water

2-3 pitted dates

1 tsp cinnamon

a pinch of Himalayan sea salt

optional: a few drops of stevia or 1 tsp of Manuka honey

Directions:

Blend everything together in a high speed blender, alternating from low to medium/high for a few minutes. The cashews should be soft from the soaking and will blend with the water nicely, allowing you to drink the milk, chunk free, without straining!

Enjoy babes!

With love always,

Ashley

Comment

Butternut Squash Soup

Ingredients:2 tbsp. grass-fed butter1 small yellow onion, chopped2 stalks celery, chopped2 medium sweet potatoes, chopped into 1inch cubes2 medium carrots, chopped into rounds1 medium butternut squash, peeled,seeded, and cubed into one inch pieces32…

Ingredients:

2 tbsp. grass-fed butter

1 small yellow onion, chopped

2 stalks celery, chopped

2 medium sweet potatoes, chopped into 1

inch cubes

2 medium carrots, chopped into rounds

1 medium butternut squash, peeled,

seeded, and cubed into one inch pieces

32 oz chicken bone broth or chicken

stock

2 tsp. garlic powder

1 1/2 tsp. sea salt

2 tsp black pepper

optional toppings: red pepper flakes, micro greens, and/or truffle oil.

Directions:

1. In a deep pot, heat the butter over medium heat. Add the onion, celery, sweet potatoes, carrots, and squash. Cook vegetables for 3-5 minutes, stirring occasionally, until they start to become tender.

2. Add bone broth (or vegetable stock), garlic powder, sea salt, and black pepper to vegetables. Stir so that mixture is well combined.

3. Bring mixture to a boil. Reduce heat to low, cover pot, and let simmer for 35-40 minutes.

4. Use an immersion blender to blend soup inside pot or transfer soup to blender, a few cups at a time, and blend until smooth.

**You may use olive oil in place of grass fed butter and vegetable stock in place of chicken broth/stock if you want to make this recipe vegan!

It’s that time of year with butternut squash and pumpkin recipes every where you turn! To be honest, I’m not a huge pumpkin fan (although I do have a pumpkin chocolate chip cookie recipe that I love), but I do love butternut squash. This soup is so filling, so good for you, and the perfect fall dinner. I hope you love it as much as I do! xo

Comment

Turmeric Latte

This is my favorite drink when the temperatures start to get cooler. I live in Seattle and October gets prettyyyy chilly. I like it though…for now. This Turmeric Latte (no coffee or caffeine) is like a hug in a mug. I love it because its a little bit sweet, a tiny bit spicy, creamy, and filled with lots of healing ingredients. My favorite ingredients in this drink are He Shou Wu and Ashwagandha. They are both adaptogenic herbs that help your body return to homeostasis or balance. He Shou Wu is especially good for your hair, nails, skin, and nervous system. It’s considered an herb for beauty and longevity. Ashwagandha is especially good for relieving stress (say no to adrenal burnout) and supporting the immune system. These healing benefits make them the perfect addition to the anti-inflammatory Turmeric Latte. You may wonder why this drink has black pepper added to it. That’s because the curcumin in Turmeric, which acts as an anti-inflammatory, is best absorbed by the body when taken with piperine which is found in black pepper.

IMG-2584.JPG

Turmeric Latte:

1 tsp Turmeric powder

1 1/2 cups cashew or almond milk

1/8 tsp black pepper

1/8 tsp nutmeg

1 tsp honey

1 tsp coconut butter

  1. Heat the cashew or almond milk up on the stove.

  2. Add the milk and all other ingredients into a blender.

  3. Blend until well combined and enjoy!

Comment

How 16 oz of celery juice every morning can transform your health

IMG_8962.jpg

If you follow me on instagram, then you know I love my celery juice. I truly do. I know that without any information or background this sounds like possibly the weirdest drink on the planet. I get that, but let me explain. I first heard of drinking celery juice back in July 2017.  I read about it in the book “Medical Medium” by Anthony William. I had been following Anthony on instagram "@medicalmedium" for a while at this point and loved the factual information he always posted. It took me awhile to buy his book and learn more about his story and what he was all about, but once I started reading “Medical Medium”, I couldn’t put it down. These days I will ramble on and on about him to anyone who is willing to listen to me. If I’ve ever talked to you about Anthony William please know it’s because I care about you and I want you to be in the best health, always. I truly believe Anthony’s expertise, although quite unusual, is unmatched and he is truly a blessing. After reading his book “Medical Medium” and feeling as if Anthony knew me personally because he identified every single symptom I’ve ever experienced, I was willing to try anything he recommended for health and vitality. When I found out about Anthony William I have been on my health and wellness journey for over 8 years, and although the difference between how I feel now and how I felt then is night and day, I still have stubborn symptoms that creep up. I’m also so fascinated with everything health and wellness that I love experimenting with new ideas, superfoods, techniques, etc. So when I had heard of drinking celery juice to heal and rid the body of the Epstein barr virus (more on this later, in another post), I was all for giving it a try. This medicinal drink, according to Anthony William, is responsible for strengthening hydrochloric acid in the gut and helps the liver to produce bile in order to break down food. It also supports the central nervous system and the adrenal glands. It cleanses the thyroid and helps the production of the thyroid hormone T3. In August I started drinking 16 oz of celery juice every day. It took me at least 3 weeks to notice any changes, but my digestion was better, my skin was so clear and dewy, I had more energy, and I had less cravings for salty foods. At this point, I’ve been drinking celery juice on and off for the past 9 months and highly, highly recommend it to anyone who wants to transform their health. I was out of the country for 2 weeks in February and the other two weeks of the month I wasn't drinking my celery juice and I noticed such a difference in my health. I started seeing a Nutrition Response Testing Practitioner in March  which you can read about HERE and started to drink my celery juice again and after a month and a half, I feel better than I did before. All you need to do to make this simple drink is juice enough celery to make 16 oz (usually one whole bunch does the trick) or blend chopped celery with 1 cup of water until it turns into liquid and then strain through a cheese cloth or nut milk bag. Trust me, this powerful drink is so worth the trouble of buying celery on a weekly basis and juicing or blending it. Your health is worth it and you are worth it. Always.

Comment

HEALTHY + GF Avocado Flatbread

THIS is one of my favorite recipes. As a girl who doesn't handle gluten very well, I miss things like bread and pasta SO much. I've tried a million different gluten free items and a lot of times they just fall short of my expectations. I grew up being a pasta and bread feen and when I found out I didn't digest gluten very well, I was pretty devastated. I'm really stubborn, so of course I still tried to eat these things even though I knew they would make me sick. Now that I've been on my health kick for a solid 8 years now, my body can handle a little bit of gluten just fine, especially when I take my digestive enzymes, but it's still not really worth it for me knowing that it isn't healthy for my body. This is why I decided to make my own flatbread for avocado toast and I promise its SO good.


IMG_9748.jpg

Flatbread Recipe:

1 tbsp chia seeds
1 1/2 c almond flour
1 tbsp chopped rosemary, thyme or dill
1 tbsp ghee/grass fed butter, softened
1 tsp apple cider vinegar

1. Preheat oven to 375 degrees
2. Add chia seeds to a bowl with 3 tbsp of warm water. Wait 10-15 minutes for the chia seeds to thicken and soak up the water.
3. Combine all ingredients except the chia seeds and apple cider vinegar. Once everything else is thoroughly combined, add the chia seeds and apple cider vinegar. Note- you might have to use your hands to thoroughly mix everything together and get it all to stick. 
4. Roll out into 2 flatbreads and bake at 375 for 10-12 minutes.

Avocado spread:

1 small, ripe avocado
1 tbsp veganaise
1/2 tbsp lemon juice
1/2 tsp garlic powder
1/2 tsp black pepper
1 tsp sea salt
hot sauce + chili flakes to taste

1. Mix all of the ingredients together until thoroughly combined.
2. Spread mixture on gluten free flat bread

optional: garnish with watermelon radishes, micro greens, and/or arugula for an added nutrient hit. You can always drizzle olive oil and sea salt over the top as well.

Enjoy xoxo 

Comment

Vegan + GF protein balls

It's a 3 pm or an 8 pm thing. I want something sweet, but I know that sugar does nothing positive for my body. It's not that I NEVER have anything with sugar in it, I'm a human being, but I try to stay away from it because I'm trying to look 20-something for the long haul. These protein balls are one of my favorite things to snack on when I want something sweet, because they taste semi-sweet but have absolutely no added sugar and they have protein and fiber to fill me up. 

IMG_1028.jpg

I'm in the process of creating a 5-day clean eating reboot program for free and these will definitely be a part of it! But I thought I would share them a little earlier, because that's what I tend to do. Anyways, if you want a healthy snack and something to keep those sugar cravings in check, definitely try these out. I have a feeling you're going to love them. xo

Protein Balls:

6 tbsp plant based protein powder (I used Sunwarrior vanilla)

2 tbsp almond or peanut butter

2 tbsp chia seeds

1 1/2 tbsp monkfruit sweetener

6-8 drops stevia (start slow and add more as needed)

2 tbsp warm water

2 tbsp coconut milk (or any nut mylk of your choice)

1/2-1 tsp cinnamon

optional coconut flakes for rolling balls in

Method:

Put everything except for coconut flakes in a food processor or high speed blender and blend until well combined. Roll into small balls and coat in coconut flakes if desired. Makes roughly 10 balls, depending on how big you make them. 

Enjoy!

Comment

Nettle Leaf and Red Clover Infusion

OH tea infusions...

HHRTE2913.jpg

What is a tea infusion? Basically it is herbs that are steeped for hours in hot water, strained, and then drank in place of water. I love them. I have played around with a few of them and I have found Nettle Leaf and Red Clover to be my favorite combination. Nettle leaf is incredibly nourishing to your adrenal glands and endocrine system as a whole. It has the ability to balance hormone levels naturally and is also an anti-inflammatory. Nettle leaf also contains many different minerals such as magnesium and potassium as well as vitamins such as A, D, K and many B vitamins. It's basically a powerhouse. Red Clover is another one of my favorites because it is also jam packed with nutrients such as selenium, magnesium, iron, and manganese as well as vitamin A and various B vitamins. This herb is amazing for cleansing the lymph and building blood. It is also great for breaking up and reducing stored fat to be flushed out of the body. If you tend to feel fatigued or exhausted, red clover is a great addition because it has a great energizing effect and it also has the ability to cleanse toxic heavy metals from the body. 

This infusion is incredibly easy to make.

3 tbsp Organic Nettle Leaf

3 tbsp Organic Red Clover

32 ounces filtered hot water

Place all the ingredients in a glass jar or container and steep for at least 4 hours. Strain the mixture and keep in the refrigerator for up to 3 days. 

When serving the mixture, cut it in half with fresh, filtered water and drink in place of water. I usually pour 16 oz in a jar or water bottle and top of with 16 oz of filtered water and drink this throughout the day. 

Your body will thank you for the beautiful addition of these healing herbs. Enjoy lovelies xo 

Comment

Strawberry Chia Seed Pudding

IMG_9925.jpg

You guys. You have to make this. Like tomorrow morning.. or just ASAP. This is the easiest recipe with very few ingredients and so healthy with all the omega 3's, fiber, and vitamin c. It's an easy grab-and-go item to have for breakfast and still so nutritious and will keep you full for hours, honestly. This recipe was saved for my health + wellness program launching the second week of January, but I had some requests for the recipe, so I decided to share early! I hope you love it as much as I do. 

Ingredients:

4 tbsp chia seeds

1 1/2 cup fresh strawberries

1 cup coconut milk

1 tbsp monk fruit sweetener

Directions:

1. Puree the strawberries and coconut milk in a blender until smooth.

2. Mix chia seeds and strawberry puree mixture together and stir in the monkfruit. 

3. Place in a mason jar or air tight container overnight or at least 6-8 hours so the chia seeds can soak up the liquid. 

4. Top with fresh strawberries, banana, coconut flakes, goji berries, or whatever toppings you choose. It's fine just as is too!

5. Enjoy!

Comment