Chocolate Cashew Mylk (dairy-free and refined sugar-free)

Sometimes I crave some of the things I used to eat as a kid. Nesquik anyone?! I know it’s not healthy at all, but that chocolatey powder mix stirred up in milk was soooo good. I wanted to make a healthy spin on chocolate milk that was dairy free as well as refined sugar free. This Chocolate Cashew Mylk is so satisfying! It’s the perfect amount of sweet and is seriously so creamy, you would think it was real dairy. It’s also super easy to make and can be drank either cold or warmed up like hot chocolate. All you have to do is throw all the ingredients in the blender and you’re good to go! I hope you enjoy this one. Xo

Chocolate Cashew Mylk.jpg

Ingredients:

1 cup soaked cashews (soak the cashews for 2-4 hours, it helps with digestibility)

4 cups filtered water

1 date, pitted

2.5 tbsp maple syrup

2.5 tbsp cacao powder

1 1/2 tsp vanilla extract

1/2 tsp cinnamon

1/4 tsp sea salt

Directions:

Throw all the ingredients in a high speed blender for 1-2 minutes until smooth.

You can store in the fridge for up to 4 days. Serve cold or warmed up!

With love,

Ashley

Comment

Vegan and Gluten-free Pad Thai

I’m interrupting soup season to bring you this healthy Pad Thai recipe. Pad Thai has been one of my favorite foods for such a long time. I love the peanut sauce with the vegetables and thick noodles. I decided to change up the traditional peanut sauce by adding in some extra spice with sriracha and cilantro. I love making my recipes healthy while still providing the most flavor possible. This recipe is pretty simple; you basically cook the noodles, blend up the sauce, sauté the vegetables, and mix it all together. It’s good leftover the next day too! Fun fact about me is that I almost prefer leftovers over freshly cooked because I like eating things like spaghetti, pizza, and most pasta dishes cold. Just one of those weird preferences, I suppose. :)

Gluten-free Pad thai.jpg

Ingredients:

1/4 and 1 tbsp peanut butter

1 inch knob ginger, shredded

4 cloves garlic

1/2 cup cilantro

1/4 cup and 1 tbsp water

2 tbsp tamari

1 tsp Apple cider vinegar

1 tsp sea salt

1 tsp black pepper

2 tbsp avocado/olive/coconut oil (for stir frying)

1 red bell pepper, thinly sliced

1 orange bell pepper, thinly sliced

2 jalapeños, thinly sliced

1/2 cup chopped green onion

1 cup cilantro, stems off

12 oz gluten-free fettuccine noodles, cooked

2 tbsp sriracha (you can add less sriracha or omit completely if you would like)

3 tbsp sesame oil

Directions:

1) Add all the ingredients starting with the peanut butter and ending with the black pepper into a blender and blend until smooth.

2) Heat the avocado oil (or whatever cooking oil you chose) on medium heat in a large pan .Add the red bell pepper, orange bell pepper, and jalapeño to the pan and sauté for 7-9 minutes, until vegetables soften.

3) Add the peanut sauce to the pan with the vegetables and stir to evenly coat. Once vegetables are well coated, stir the noodles in with the mixture. Stir until everything is thoroughly combined and warmed through. Plate the mixture and top with green onion and cilantro.

With love,

Ashley

Comment

Simple Arugula Salad w/ Creamy Garlic Dressing (vegan + gluten-free)

This Salad. I’ve had it on repeat the past week or so because it’s my new favorite. It’s so easy and so full of flavor. Two of the best things when it comes to recipes, right?! This salad is vegan but still has protein and healthy fats to keep you full longer. I also love the addition of pumpkin seeds for some added crunch and better nutrient absorption. When you eat nuts/seeds with greens, it makes the vitamins, minerals, and antioxidants more bioavailable for your body to absorb and use. I add sauerkraut to this recipe for the gut health benefits, but you can completely omit if sauerkraut isn’t your thing.

Arugula salad and creamy garlic dressing.jpg

Ingredients

Salad:

2 cups arugula

3/4 cup cooked quinoa

1/4 cup chopped cilantro

1/2 avocado

2 tbsp pumpkin seeds

3 tbsp sauerkraut

optional add ons: green olives, green onions, microgreens

Dressing:

1/4 cup cashews

1/2 cup water

2 tbsp nutritional yeast

2 tbsp extra virgin olive oil

1/2 lemon, juiced

6 garlic cloves

1 tsp sea salt

1 tsp black pepper

1 tsp apple cider vinegar

few drops truffle oil (optional)

Directions

1) Blend all of the dressing ingredients and set aside.

2) Mix all salad ingredients together. Pour desired amount of dressing over the salad and mix until evenly coated.

**This salad is for one serving, but you will more than likely have enough dressing for 2-3 servings.

With love,

Ashley

Comment

Chicken and Quinoa Vegetable Soup (gluten-free and dairy-free)

Summer is my absolute favorite season, but I’ve been secretly waiting for the weather to turn so that I wasn’t the crazy person eating soup in 80+ degree weather. I love soup. I can eat it all year round no problem. I feel like there are so many different creations you can make and I usually feel more full and satisfied after eating soup than I do after a salad. Thats the true winning combo right there though: soup + salad. Anyways, I decided I wanted to make a healthy chicken noodle soup (sans noodles) so I decided to try a chicken and quinoa soup with vegetables and it turned out better than I had hoped. This one will be on repeat for me this fall and winter and probably year round if I’m being honest. This is a one pot soup and so easy to make!

Chicken Quinoa Soup.jpg

Ingredients:

1 yellow onion, diced

6 garlic cloves, diced

2 tbsp avocado oil or ghee

2 large carrots, chopped into rounds

3 stalks celery, chopped into pieces

2 tsp sea salt

1 1/2 tsp black pepper

8 cups chicken broth

1 lb chicken breast (should be 2 chicken breasts)

2 tbsp chopped rosemary

1/2 cup dry quinoa

Directions:

1) Heat avocado oil or ghee over medium heat. Add in the diced onion and cook for 3 minutes, stirring occasionally.

2) Add in garlic, carrots, and celery and sauté for another 4-5 minutes, stirring occasionally.

3) Add in Sea salt, black pepper, and chicken broth. Bring to a light boil and add in chicken breast, rosemary, and dry quinoa. Let the chicken cook for about 8-10 minutes until cooked through. You can pull out one chicken breast and cut in half to see if its fully cooked.

4) Once cooked through, pull out both chicken breasts and shred the chicken on a cutting board. Put the chicken back in the pot of soup and let the mixture simmer for another 20-30 minutes until the quinoa has fully cooked.

5) Add in more salt, pepper, and garlic to taste and enjoy!

With love,

Ashley

Comment

Gluten-free + Sugar-free Chocolate Chip Cookies

I know what you’re thinking and yes, it is possible to make a gluten-free and sugar-free cookie taste good. Like, really good. There’s just something about a fresh chocolate chip that makes me so happy. Maybe I’m bias, but I think that my mom made the best chocolate chip cookies growing up. They were always the perfect balance of sweet and salty and jussstttt chewy enough. The only issue with a good chocolate chip cookie is that I have a hard time eating just one..or two. This recipe is a bit more clean with the healthy fat being almond butter instead of actual butter, monkfruit sweetener in place of sugar, and almond flour instead of all purpose flour. The ingredients are a bit healthier so that you can eat more than one without feeling guilty or having the sugar crash afterwards.

Gluten-free chocolate chip cookies.jpeg

Ingredients:

2 cups almond flour

1/2 cup arrowroot flour

1 cup and 2 tbsp monkfruit

1 tsp sea salt

1 tsp baking soda

1/2 cup and 2 tbsp coconut oil, melted

1/2 cup almond butter (preferably one that doesn’t have any added sugars)

2 free range eggs

2 1/2 tsp vanilla extract

3/4 cup chocolate chips (I use Lily’s dark chocolate chips because they don’t contain any sugar)

Directions:

1) Preheat oven to 350 degrees F and grease two baking sheets.

2) Melt the coconut oil, either over the stove or in the microwave and set aside to cool.

3) Add the almond flour, arrowroot flour, baking soda, and salt to a large bowl and stir until thoroughly combined.

4) Combine the monkfruit sweetener, melted coconut oil, almond butter, eggs, and vanilla in a separate mixing bowl. Once combined, add the wet mixture to the mixing bowl with the dry ingredients. Stir until thoroughly combined.

5) Fold the chocolate chips into the dough.

6) Roll cookies into medium sized balls and place on the baking sheet about 1.5-2 inches apart, giving them room to spread. You should come up with about 24-26 cookies. Bake for 14-16 minutes.

7) Remove from oven and let cool for a few minutes before removing to a cool rack or plate.

Enjoy!

With love,

Ashley Rose

Comment

Chop Chop Salad w/ Cilantro Dressing

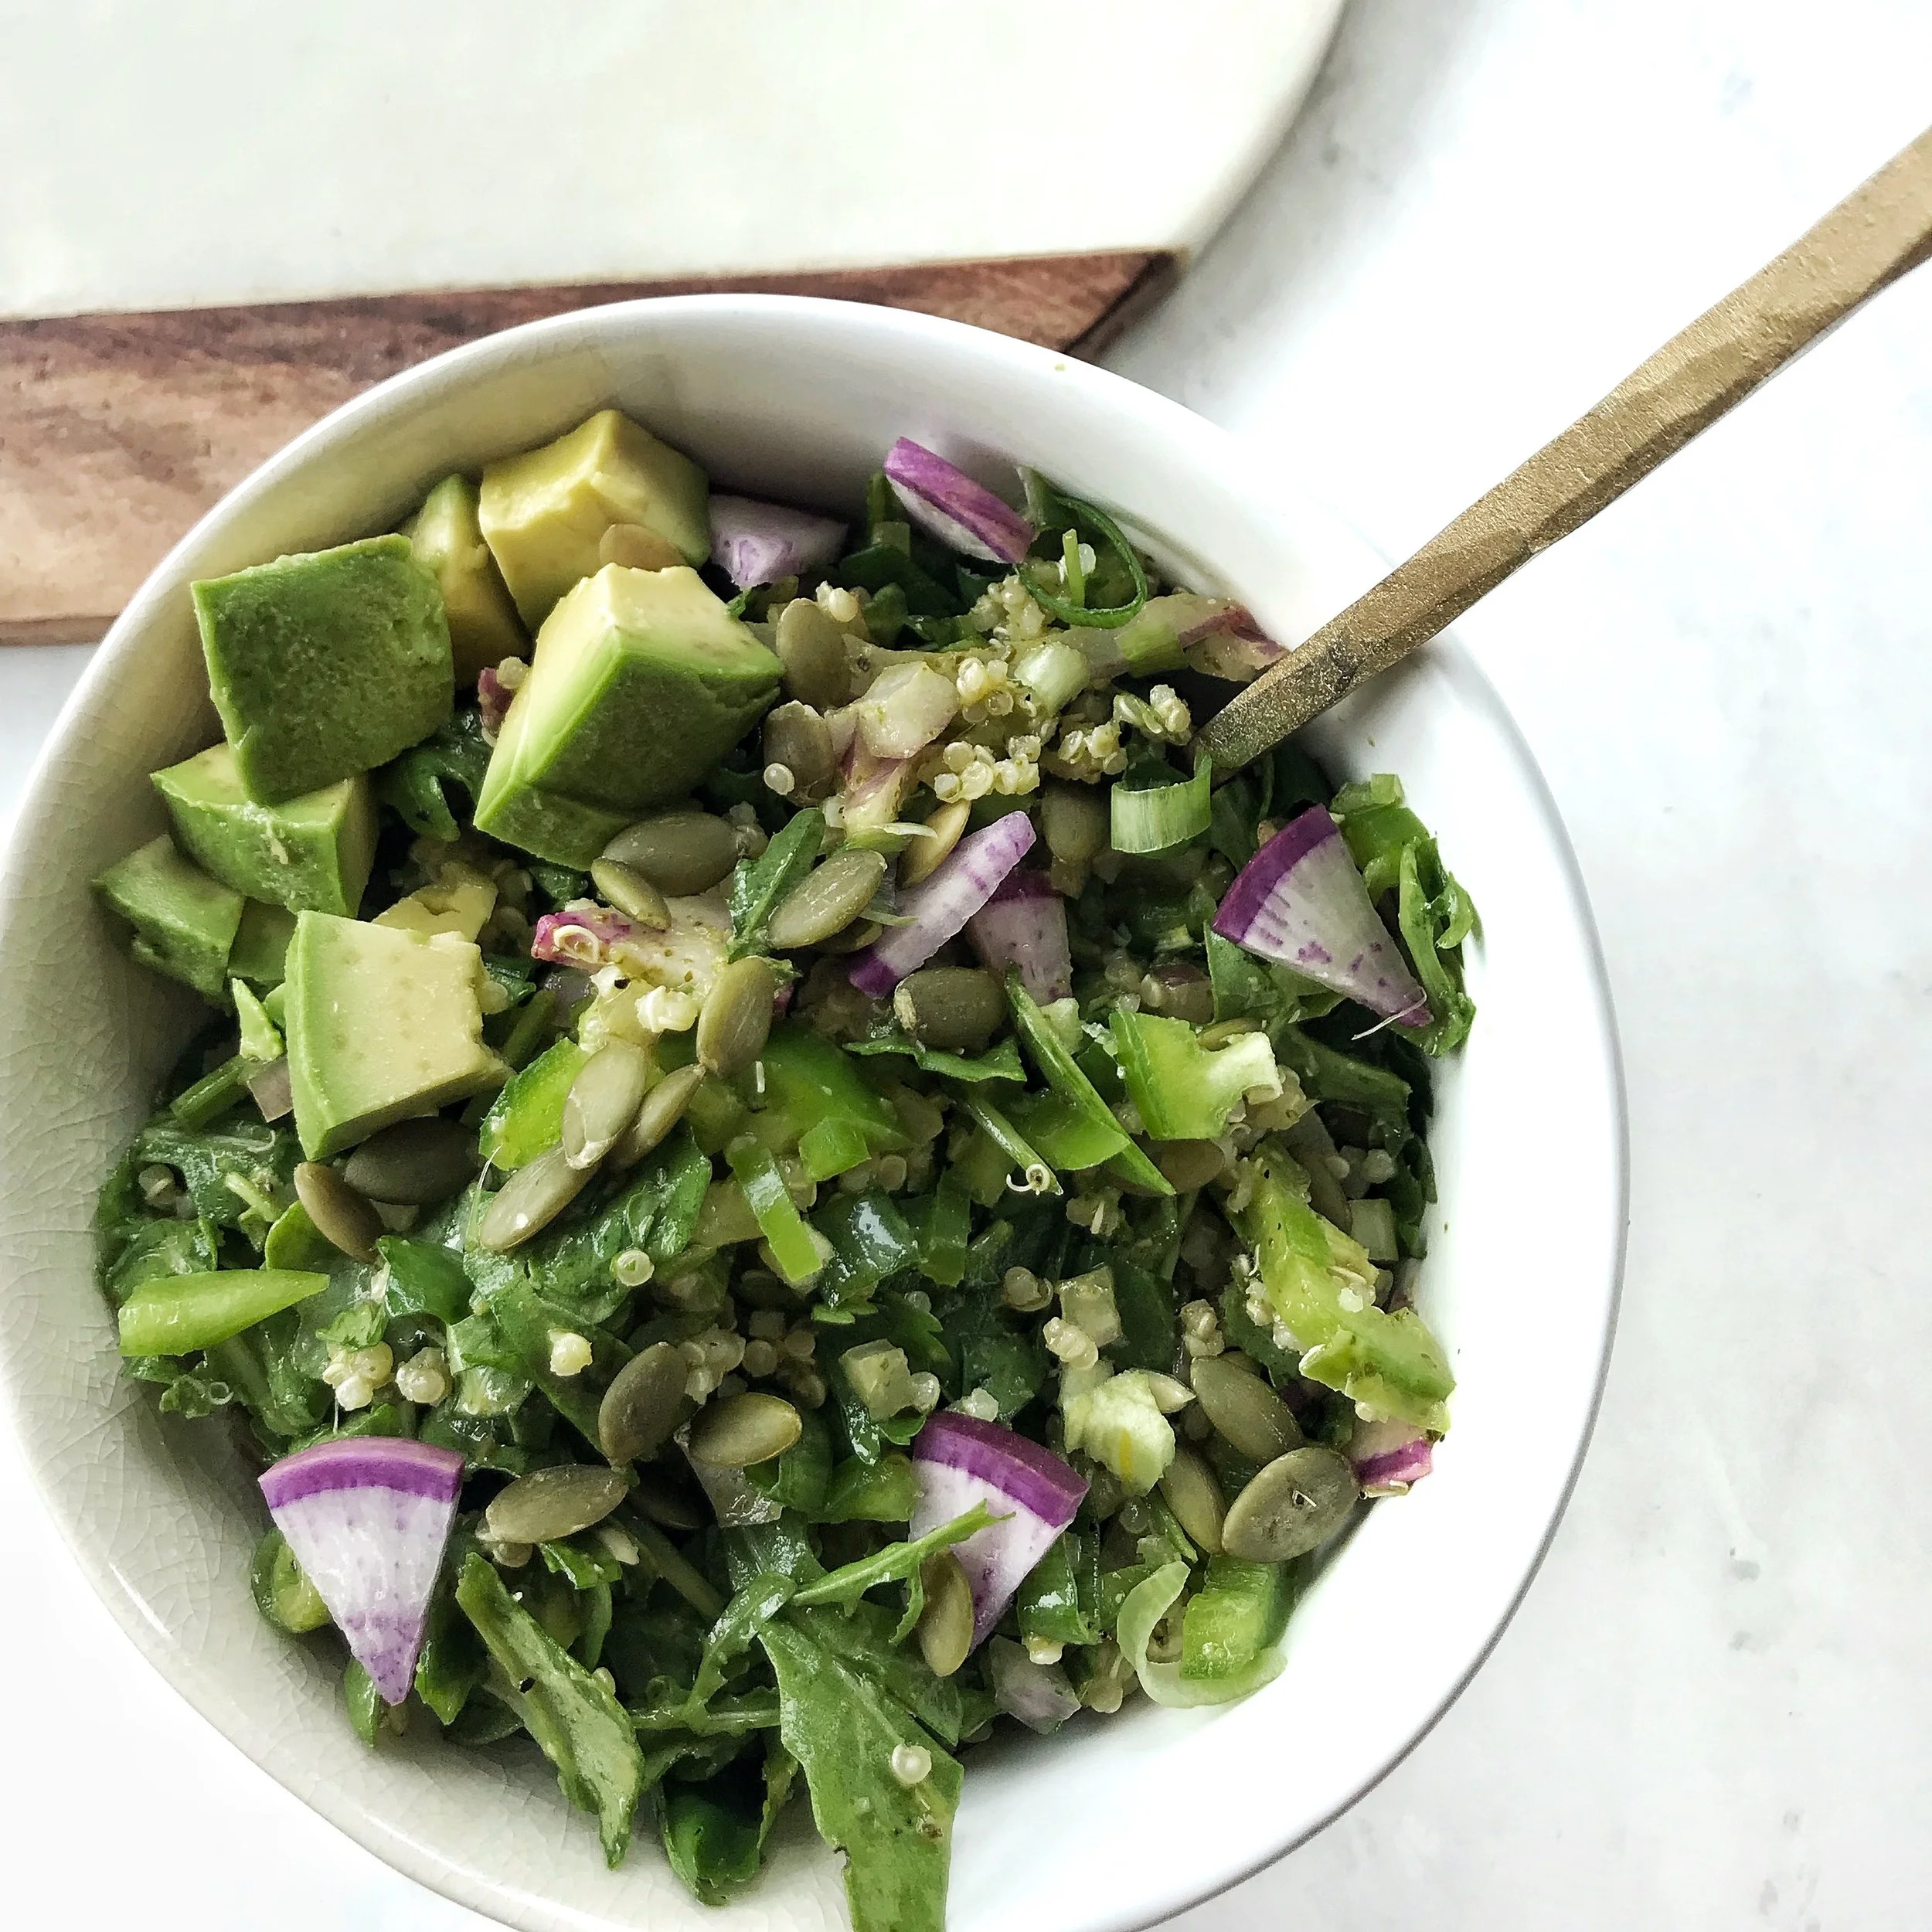
This is my favorite salad I’ve ever made. You probably know by now that I’m a huge fan of cilantro and add it to a lot of my dressings and salads. I wanted to make a salad that was similar to my favorite salad from a place I like to go for lunch. I’m really happy with how this dressing turned out and honestly, this salad is so filling and is full of healthy fats, protein, and fiber. I also love the addition of the pumpkin seeds in this salad to give some added crunch but mostly because when nuts or seeds are added to salads, it makes the nutrients in the vegetables more bioavailable to your body, therefore you absorb more of the vitamins and minerals. The fun thing with salads is you can add as many different vegetables as you would like to give different flavors, texture, and color.

Chop chop salad with Cilantro Dressing .jpeg

Ingredients:

2 cups arugula

1/2 cup cooked quinoa

1/4 cup chopped red onion

1/4 cup diced jalapeño

1/4 cup sliced green olives

1/4 cup diced green onions

1/4 cup chopped watermelon radishes

1/4 cup pumpkin seeds

1/4 avocado, sliced

1 cup cilantro

1/4 cup olive oil

2 tbsp toasted sesame oil

1 tbsp apple cider vinegar

1/2 tsp sea salt

1/2 tsp black pepper

5 garlic cloves

1 lime, juiced

Directions:

1) Place the cilantro, olive oil, sesame oil, apple cider vinegar, sea salt, black pepper, garlic, and lime juice in a blender and blend until thoroughly combined.

2) Toss all of the vegetables together (I like to give the arugula a rough chop before I toss because I like more of a “chop chop” salad) and pour 1/4 cup of the dressing over the top. Stir and toss to make sure its thoroughly coated and enjoy!

With love,

Ashley

Comment

No-Bake Chocolate Walnut Bars

Chocolate Walnut Bars.jpeg

Alright, I feel like everything I’ve been making lately has to do with chocolate in some way. I’m not mad about it and I hope you aren’t either! I was playing around with these bars because I had some walnuts in my pantry that I needed to use. These are super simple, keep really well in the freezer and are free of gluten, dairy, and refined sugar.. just the way I like it. I feel my best when I cut these three inflammatory ingredients out and that’s why the recipes I share with you never have any of them included. I definitely have a sweet tooth, nothing too crazy, but I almost always want a little something sweet after dinner. That’s why I’ve been working on experimenting with clean desserts lately. I definitely don’t mind taste testing these recipes and I hope you enjoy making them too!

Ingredients:

For the crust or bottom layer-

1 and 3/4 cup walnuts (preferably soaked for 2-4 hours then dried)

1/2 tsp vanilla

2 tbsp maple syrup

1/4 tsp cinnamon

For the middle layer-

1 cup cashews (preferably soaked for 2-4 hours)

1 1/2 tbsp melted coconut butter

3 tbsp maple syrup

1/4 cup water

1 tsp vanilla extract

1/4 tsp sea salt

1/4 tsp cinnamon

For the chocolate top layer-

2 tbsp cacao powder

2 tbsp maple syrup

2 tbsp coconut milk

4 tbsp coconut butter or oil

Directions:

  1. For the crust or bottom layer blend the walnuts until broken down into small pieces. Add in the remaining ingredients for the crust and blend a few more seconds to make sure its all incorporated and thoroughly combined. It’s okay if you still have a few chunks of walnuts. Pour mixture into a greased 9” by 5” pan (I use coconut oil spray to grease) and press down firmly until the mixture is evenly spread and covers the bottom of the pan. Set this aside in the freezer while you make the middle layer.

  2. Blend all of the ingredients for the middle layer in a blender or food processor. You’ll want to make sure your bottom layer was in the freezer for at least 5 minutes before you add the middle layer. Once it has and your middle layer is done blending, pour the mixture over the top of the crust and spread evenly. Put the pan back in the freezer for at least 15 minutes while you are making the chocolate top layer.

  3. Melt the coconut butter and then stir in the cacao powder and maple syrup until thoroughly combined. Add 1 tbsp of coconut milk and stir in well. If the mixture is too thick, then add the second tbsp of coconut milk. Pour this mixture over the top of the middle layer and let set in the freezer for 25 minutes.

  4. Take the pan out and cut into nine, 1 inch bars and then cut down the middle going the long way to make 18 bars total. The dessert will still be semi soft, but you want to make sure to cut it when its like this so that the chocolate doesn’t crack from being too frozen. Set back in the freezer for another 10-15 minutes to harden. Enjoy!

With love,

Ashley

Comment

Chocolate Cherry Chip Smoothie

Chocolate Cherry Chip Smooth.jpeg

So, I bought a huge bag of cherries from Costco. They were supposed to be for the 4th of July, but didn’t really get eaten and I didn’t want them to go to waste so I was trying to figure out what to do with them. I started brainstorming recipes that I could make, but was having a hard time coming up with a good idea. I decided I could freeze some of the cherries and then the thought popped into my head that a chocolate cherry smoothie would be so good to try! I froze the cherries overnight and was so excited to try this recipe the next morning. So, if you bought all those cherries at Costco like me and don’t know what to do with them, this might just be the recipe you need!

Ingredients:

1 cup frozen cherries

1 cup macadamia milk (you can use any nut milk of your choice)

1/2 cup ice

1 1/2 tbsp cacao powder

1 scoop protein powder (I used plain collagen, but you could use vanilla or chocolate protein or omit altogether)

1/2 tbsp coconut oil or coconut butter

1/2 tsp cinnamon

1 tsp honey

1 tbsp chia seeds

8-12 drops stevia (optional)

1 tbsp cacao nibs

Directions:

Blend all of the ingredients except for the cacao nibs until thoroughly combined. Add the cacao nibs and blend on low for about 10-15 seconds. Enjoy!

With love,

Ashley Carlson

Comment

Rainbow Chard Vegetable Wraps w/ Cilantro Peanut Sauce

It’s summer time and to me that means lots of fresh vegetables! I’m much more into simple recipes when its warm out and ones that are filled with the freshest ingredients. I love making salads in the summertime, but I’ll admit that they can get boring after awhile. I decided to make some vegetable wraps instead and I have to say that the sauce is one of my favorites I have made to date. It’s so addicting! Even if you wanted to pass up making the vegetable wraps, I still highly recommend making this sauce to dip your vegetables in.

Rainbow Chard Wraps w: Peanut Sauce.jpeg

Ingredients:

4 rainbow or swiss chard leaves

2 cups chopped vegetables (I used cucumbers, bell pepper, shredded carrots, and cabbage)

1/4 cup peanut butter

3 tbsp toasted sesame oil

3 tbsp sriracha

1 tbsp tamari

1 tbsp grated ginger

4 garlic cloves

1/4 cup water

1/2 cup cilantro

1 tsp sea salt

1 tsp black pepper

1 tsp apple cider vinegar

Directions:

  1. Cut the thick stem off the chard, even up into the bottom of the leave so that it doesn’t snap when you roll it. Place the cut up vegetables at the base of the leaf, where the thick stem was and fold the sides in and roll until you get to the end of the leaf. Do this same process will all 4 chard leaves.

  2. Place the remaining ingredients (everything from the peanut butter on down the list) into a blender and blend until smooth. Dip the wraps into the peanut sauce and enjoy!!

With love,

Ashley

Comment

Almond Butter Chocolate Chip Freezer Fudge

freezer fudge.jpeg

I’m one of those people that has to have something sweet almost every night after dinner. It’s usually a couple of pieces of dark chocolate, but I also like to have healthier dessert options around too. I love this freezer fudge because it keeps well in the freezer and has only about 3 grams of sugar per serving. I made these using real maple syrup and not cane sugar so they are also refined sugar free as well as gluten and dairy free. They are so easy to make and only require a few ingredients so it’s a win win!

Ingredients:

1 1/2 cups almond butter

1/4 cup coconut oil, melted

1/4 cup maple syrup

1 tsp vanilla extract

3/4 cup dark chocolate chips (I like using Lily’s because they’re sugar free)

6-8 drops stevia (optional)

Directions:

1. Melt the coconut oil in a small pot over low-medium heat. While this is melting, add the almond butter to a mixing bowl.

2. Once the coconut oil is melted, add the vanilla extract and maple syrup to the pot. Stir the mixture and then take it off the heat and pour it over the almond butter. Stir the mixture until it’s well combined.

3. Add the stevia if you would like to sweeten the mixture just a bit more. Stir in the chocolate chips and pour the mixture into a 9”x5” loaf pan lined with parchment paper. Place the pan, uncovered, on a flat surface in the freezer and freeze for about an hour, until the fudge is frozen. Cut the pieces into 1.5 inch squares and enjoy! The fudge will keep in the freezer for a few weeks (if it even lasts that long!).

With love,

Ashley

Comment

Almond Milk Yogurt and Strawberry Popsicles

Summertime is officially here which means lots of fresh fruit and frozen treats. It’s my favorite time of the year and I love experimenting with different fruits and vegetables that are in season. Strawberries have been at the top of my list and I thought what better than to make homemade popsicles using fresh strawberries and almond milk yogurt to add some creaminess (even though that word makes me cringe). These are a perfect balance of vanilla from the yogurt and fruity sweetness from the strawberries. They’re super simple and will last for a few weeks in the freezer (if you don’t eat them by then!). Enjoy!

popsicles .jpeg

Ingredients:

16oz unsweetened almond milk yogurt

2 cups organic strawberries

7 tbsp monkfruit sweetener, divided

2 tsp vanilla extract

Directions:

  1. Blend the yogurt, vanilla extract, and 5 tbsp monkfruit sweetener until well combined. Set the yogurt aside.

  2. Blend the strawberries with 2 tbsp monkfruit sweetener. You can blend the mixture until all the strawberry chunks are gone or leave some chunks, just depending on how you want your popsicles to be.

  3. Pour yogurt and strawberry mixture into popsicles molds. My molds hold about 3 oz of liquid each. I typically will do a layer of yogurt, then strawberry, then yogurt or vice versa. Do this until the molds are full. Place molds in the freezer for about 5-6 hours. I always test mine by trying to pull it out by the stick to see if the stick stays in or not. When the stick stays put, you know they are ready to take out. Simply hold the mold under warm water for a few seconds until it loosens up and you can pull the popsicle out.

With love,

Ashley

Comment

Anti-Inflammatory and Gut Healing Morning Tonic

I stopped drinking celery juice about 6ish months ago. For no major reason other than the fact that it was kind of a pain to juice every morning and I wasn’t seeing the benefits that I had seen for the first year and a half of drinking it. I wanted to replace this with another morning beverage that was hydrating, alkalizing, and anti-inflammatory. Our liver’s detox at night, usually between 2 and 4 am, making our bodies acidic when we wake up the next morning, so I wanted to create something that would rehydrate and flush out the toxins. A large glass of water is great for this, but I decided I wanted to kick it up a notch and add more nutrients. Suja juice has a drink called “lemon love” that is sooo refreshing and so good. My mom introduced me to it a couple months ago and it is so addicting. It’s also $5 a bottle and really only has lemon juice, filtered water, stevia and cayenne pepper. I figured I could easily make my own version, but add a few more things that would make it even healthier. So I created my own morning tonic that is anti-inflammatory and good for your gut health! The turmeric in it is super good for fighting inflammation and both turmeric and the aloe vera are great for gut health. There is added black pepper to help with the absorption of the turmeric and cayenne to get your metabolism going. This drink is also very hydrating and alkalizing because of all the fresh lemon. I hope you enjoy it as much as I do!

AshleyCarlson-58.jpg

Ingredients:

4 lemons, peeled

1 orange, peeled

5 inches of ginger

4 inches of turmeric

1 cup aloe vera chunks, freshly cut from the plant or 3/4 cup aloe vera juice

1/2 tsp black pepper

1/2 tsp cayenne pepper

Directions:

Peel your produce and one by one run it through your juicer. Transfer the juice from the juicer into a blender and add the aloe vera, black pepper, and cayenne pepper. Blend until everything is fully combined. You should end up with around 16-20 ounces of liquid. Pour this into a pitcher or glass jar and top with enough water to make the tonic equal to 32 ounces total. Pour 6 ounces of the tonic into a cup each morning and top with another 4-6 ounces of water before drinking it. Enjoy!

With love,

Ashley

Comment

Cauliflower Gnocchi w/ Alfredo Sauce, Asparagus, and Bacon (gluten-free and dairy-free)

cauliflower gnocchi.jpeg

I’ve been experimenting a lot of cauliflower lately. I think this is my favorite recipe so far. A lot of people have heard of the famous Trader Joe’s cauliflower gnocchi that you can buy frozen. They’re made only using cauliflower, cassava flour, potato starch, olive oil, and sea salt. They’re incredibly easy to heat up and really convenient when you don’t want to spend a lot of time in the kitchen, but I found that the consistency was always a little off for me. I decided to make my own and add in some alfredo sauce along with some asparagus and bacon for extra vegetables and flavor. These are a little bit of a time commitment, so just keep that in mind, but they’re sooo worth it!

Ingredients:

1 head cauliflower

2 cups cassava flour

3 cups asparagus, cut into 1/5-2 inch pieces

4-5 strips of bacon, cut into small strips

1/2 cup cashews

1 cup water

1 tbsp nutritional yeast

1 tbsp olive oil

1/2 tsp sea salt

1/2 tsp black pepper

4 garlic cloves

1/2 yellow onion

1 tbsp grass fed butter or ghee (sub with olive oil if you would like to make dairy-free)

truffle oil (optional topping)

Directions:

  1. Preheat oven to 425 degrees and start boiling water in a medium pot. Cut the cauliflower into medium sized florets and boil them once the water is ready. You will know the cauliflower is done when you can easily stick a fork through it.

  2. Place the cauliflower into a blender and blend until smooth. Add the cauliflower pureé to a bowl and slowly mix the cassava flour in, 1/2 a cup at a time. You might need to add an extra 1/2-1 cup of flour if the batter is still too sticky and wet.

  3. Grab a small handful of dough at a time and roll out each ball until it is about a 1/2 inch in diameter and 8-12 inches long. You will then cut little pieces about 1 inch long to make little “pillows”. Keep repeating this process until you have used up all of the dough. While you are doing this, get a new batch of water in the medium pot and bring that to a boil.

  4. Once you have cut your gnocchi into pieces, you will want to place it in the water only for a few minutes, until it floats to the surface of the water. Take it out and place in a strainer until the remaining water drips off. Grease a baking sheet with olive, avocado, or coconut oil. Place an even layer of gnocchi on the baking sheet- you will most likely have 2, maybe 3 sheets of gnocchi pieces. Place each sheet in the oven for 15 minutes and then take out, flip and place back in the over for another 10 minutes.

  5. While the gnocchi is baking, cook the onion, garlic and butter in a large pan until the onion is translucent. Then transfer the mixture into the blender and blend along with the nutritional yeast, olive oil, water, cashews, salt, and pepper. Blend for a minute or two. While thats blending, place the asparagus into the the same pan and sauté for a few minutes.

  6. In a separate pan cook the bacon until its crispy. Pour the alfredo sauce mixture into the large pan with the asparagus. When the gnocchi is ready, add it to the pan. Stir mixture together until well combined and top with bacon. Add a drizzle of truffle oil to add even more amazing flavor.

    Enjoy!

    With love,

    Ashley

Comment

Cheesy Garlic Chia Seed Crackers (gluten-free/dairy-free)

Cheesy gluten free crackers.jpeg

Let’s be real, I love my snacks. I’m always looking for gluten-free options that taste good and have clean ingredients. There are some really great gluten-free products on the market, but there are also a lot that contain a lot of fillers, additives, and sugar. I love having gluten-free crackers on hand because they’re an easy and quick snack for hummus or olive tapenade. I made these cheesy garlic gluten-free crackers with minimal and clean ingredients and loved that they were full of flavor and still good for you. They’re so simple to make and are great to have around for easy snacking.

Ingredients:

1 1/2 c. almond flour

3 tbsp nutritional yeast

1/2 tsp garlic powder

1/2 tsp sea salt

1/2 tsp black pepper

1 tsp apple cider vinegar

1 tbsp grass fed ghee

1 tbsp chia seeds

Directions:

  1. Preheat the oven to 375 degrees.

  2. Mix the chia seeds in a small bowl with 3 tbsp warm water and let sit for 5-10 minutes, until the chia seeds have soaked up all the water. In the mean time, mix all of the dry ingredients together.

  3. Add the chia seeds, apple cider vinegar, and ghee to the dry ingredients and knead the dough with your hands until thoroughly combined.

  4. Roll the dough between two pieces of parchment paper until completely flattened and thin. Remove the top laugh of parchment paper and score the dough using either a pizza cutter or knife to make small, cracker shaped squares (pictured below). This will ensure you can easily break the crackers apart once they’re baked.

  5. Place the dough into the oven for 16-19 minutes, depending on how crunchy you want them.

  6. Take them out of the oven and let them cool for 2 minutes and then break apart into individual crackers. They will store just fine for 4-6 days. Enjoy!

With love,

Ashley

cheesy cracker recipe.jpeg
Comment

Vegan Basil Pesto w/ Zoodles

This recipe is so summery and fresh. It’s so light and flavorful but still filling. I love making this on a night where I don’t want to spend too much time in the kitchen, but I still want a healthy, home-cooked meal. It is great as a main meal or could be used as a side dish to chicken or fish.

pesto with zoodles.jpeg

Ingredients:

2 cups light packed basil

4 garlic cloves

1/4 c. olive oil

1 lemon, juiced

1/2 tsp sea salt

1/4 tsp black pepper

1/4 c. pine nuts

2 small zucchini’s, spiralized

1 c. cherry tomatoes, cut in half

1/4 c. kalamata olives

Directions:

  1. Place the basil, garlic, olive oil, lemon juice, sea salt, black pepper, and pine nuts in a food processor or high speed blender and blend until smooth.

  2. You can either sauté the zucchini noodles (zoodles) in a pan for a few minutes or eat them without cooking. Toss the zoodles in a bowl with the cherry tomatoes, kalamata olives, and pesto sauce.

  3. Serve and enjoy!

With love,

Ashley

Comment

Creamy Jalapeño "Ranch" Dressing (Vegan)

This dressing is what vegan spicy ranch dressing dreams are made of. I love putting this on a taco salad (or any salad for that matter) and dipping cucumbers or carrots in it. It doesn’t feel super heavy because it’s dairy free and doesn’t contain any nasty ingredients. I used an organic and clean mayonnaise that is made with avocado oil instead of weird oils like soybean or sunflower oil (this is the brand I like to use). I just use a little bit to give it that creamy flavor and texture.

Ingredients:

dairy free jalapeno ranch dressing.jpeg

1/2 c. cashews

1/2 c. water

1/2 c. mayonnaise

4 garlic cloves

1 c. cilantro

1 jalapeño

2 small-medium tomatillos

1 lime, juiced

1/4 tsp onion powder

1/2 tsp garlic powder

1/2 tsp sea salt

1/2 tsp black pepper

Directions:

Blend all the ingredients together in a high speed blender until smooth and thoroughly combined. Taste and add a little more salt, pepper, garlic, or jalapeño if you would like.

With love,

Ashley

Comment

Baked Pears with Vegan Cashew Creme Sauce

I've had the idea to make this recipe for awhile- I thought about it after having an apple crisp dessert with vanilla ice cream at a restaurant one night. I wanted to make a recipe that was healthier, but still was reminiscent of the vanilla, cinnamon, and sweetness you get from an apple crisp or an apple pie. I decided to go with pear instead of apple because I found these delicious looking pears at the grocery store. This dessert is such a great balance of sweetness and spice. It satisfies the sweet tooth while being dairy, gluten, and refined sugar free. In fact, the only sugar you will get from this recipe is the natural sugar from the pear and a tad bit of sugar from the real maple syrup.

baked pears with cashew creme.jpeg

Ingredients:

 1 pear, cut in half

1 tbsp maple syrup

½ tsp cinnamon, divided

¼ cup walnuts or pecans, crushed into small pieces

½ cup cashews, soaked for 2 hours

¼ cup filtered water

1 tbsp monkfruit

¼ tsp vanilla extract

pinch of sea salt

Directions:

1.     Preheat oven to 350 degrees. While the oven is preheating, blend the cashews, water, monkfruit, 1/4  tsp cinnamon, vanilla extract, and sea salt in a blender and set in the fridge.

2.     Place the pear, peal side down, on a baking sheet and sprinkle with 1/4 tsp cinnamon. Bake for 10 minutes.

3.     Pull pears out, drizzle each one with maple syrup and walnuts or pecans. Place back in oven for 15-20 minutes, until pears are very soft.

4.     Take pears out of the oven and scoop the cashew crème on top of each. Sprinkle extra cinnamon or maple syrup on top if you would like.

With love,

Ashley

Comment

Spicy Lime-Cilantro Cauliflower Rice

cauliflower rice.jpeg

I’ve been cutting back on my grains lately because they’ve been causing irritation in my gut. I’ve heard of cauliflower “rice” for awhile and finally decided to give it a try. Of course I wanted to dress it up and make it full of flavor and a bit more interesting. I decided to do a lime-cilantro cauliflower rice with a little bit of jalapeño to give it some spice. I love this recipe because its so easy and can be great as a side dish or even as a main meal if you want.

Ingredients:

1 head cauliflower

2 tbsp avocado oil

1 jalapeño, minced (you can omit if you don’t want the recipe to be spicy)

1/2 c scallions, chopped

3 garlic cloves, minced

1/2 tsp garlic powder

1 tsp sea salt

1 tsp black pepper

1 lime, juiced

1/2 c cilantro, chopped

Directions:

  1. Cut the cauliflower into small florets. Once it’s chopped, make sure that it is completely dry and place 1/2-3/4 of a cup of the florets in a food processor at a time and pulse a few times until the cauliflower is in small grain sized pieces. Make sure not to pulse it too long because you don’t want it to be too fine. Keep repeating this step until all the florets have been pulsed into little pieces.

  2. Warm the avocado oil on medium heat in a medium, deep pan. Add in the cauliflower and sautée for a few minutes. Add the scallions, minced garlic, garlic powder, sea salt, pepper, and jalapeño and sautée for another 3-5 minutes.

  3. After the mixture is cooked through and no longer crunchy, take it off the heat and put it in a large bowl. Stir in the cilantro and lime juice until thoroughly combined. Serve and enjoy!

With love,

Ashley

Comment

Buffalo Cauliflower Tacos

Tacos are one of my favorite foods. I love that you can make so many combinations with different toppings, sauces, and meat or vegetables. There are a couple things that I must always have on my taco; a good sauce, avocado, and cilantro. Oh and lime too! I love this version of a taco because I’m a huge fan of buffalo sauce. This is a meatless buffalo cauliflower that I think even the most avid meat eater will love. They’re packed full of flavor and have lots of substance making them very filling. I love using these tortillas when I make tacos at home because they’re gluten-free, corn-free and use minimal ingredients.

buffalo cauliflower tacos.jpeg

 Ingredients:

 1 head cauliflower, cut into florets

3/4 c. unsweetened almond milk

1 c. garbanzo bean flour

2 tsp. garlic powder

3/4 c. franks red hot sauce

2 tbsp. grass-fed butter, melted

½ avocado, thinly sliced

1 cup thinly sliced purple cabbage

½ watermelon radish, sliced and then cut into quarters

cilantro for garnish

Cilantro Jalapeno Sauce for garnish (recipe here)

4 gluten-free taco shells (you can use whatever shells you like but these are my favorite)

Directions:

1. Preheat oven to 450 degrees.

2. Combine almond milk and garbanzo bean flour in a bowl and stir until well combined.

3. Make sure your cauliflower pieces are complete dry. Coat the cauliflower pieces with the flour mixture and place on a baking sheet. Bake for 14-16 minutes.

4. While cauliflower is baking, combine franks red hot sauce and melted butter in a bowl. Take the baked cauliflower out and dip each piece in the hot sauce mixture, coating evenly. Bake for another 5 to 8 minutes.

5. Warm taco shells on oven rack or in a pan over the stove. Create a small layer of purple cabbage and then add the buffalo cauliflower on top. Add the avocado, watermelon radish, cilantro, and cilantro jalapeno sauce on top.

 Enjoy!

 With love,

Ashley Carlson

Comment

Cilantro Jalapeño Sauce

I love this sauce. I want to put it on everyyythingggg. It’s a little bit spicy, a little bit garlicky, and a little bit twangy from the lime. The idea came about for this sauce when I was visiting one of my really good friends in Bend, OR two summers ago. We went to one of her favorite Mexican restaurants and before we got there she was raving about the green sauce they serve with their chips and salsa. She said it was a secret recipe and that they don’t give it to anyone. After we sat down and started eating the famous green sauce, I asked one of the servers what was in it when he walked past. He smiled and said he couldn’t tell. I went on to say how good it was and that I could taste the garlic and jalapeño. He started to say yes theres garlic, jalapeño, cilantro, salt, pepper, and oil in it. I noted all these ingredients and knew I was going to try and remake it as soon as I got home. I started with all the ingredients he mentioned and since I didn’t know what oil they used, I decided to go with a very neutral one; avocado oil. I started by blending a little of each ingredient and then tasting it and adding a little bit more of this and a little bit more of that until I was satisfied and felt like I had the flavors where I wanted them. I wouldn’t say the two recipes are the same and they’re both unique in their own way, but I’m very happy with how my sauce turned out. I love adding it to tacos, on top of eggs, in grain and veggie bowls, as a dip for chips or crackers, and pretty much anywhere that I feel could use an extra flavor punch. I hope you enjoy it as much as I do!

cilantro jalapeno sauce.jpeg

Ingredients:

3-4 garlic cloves

1 medium jalapeño

1 lime, juiced

2 tbsp avocado oil

2 cups light packed cilantro

1/2 tsp sea salt

1/2 tsp black pepper

Directions:

Blend all ingredients in a food processor or blender. Serve on all your favorite foods!

With love,

Ashley

Comment